Showing posts with label Track. Show all posts

Wednesday, 4 September 2013

Track Laying

Curved Track
Curved rail is prepared in advance as per the straight rail except it is curved to radius to fit its location. Preparing curved track work is not very different than building straight track work and does not require any special skills. The real difference is that the rail's needs to be curved. To ensure that the rail is properly pre-bent into shape consider purchasing a Fast Tracks Rail Roller.


The Fast Track Rail Roller tool will not only make it easy to create smooth consistent curves, but will also ensure that the rail is properly pre-bent so that it will retain its shape over time. For curves use  track gauges to ensure smooth curved track work and is especially important at joints between individual sleeper bases.

Failure to properly pre-bend the rail for curved track work will result in failure over time! 

Track Laying General.
After preparing the road base and ensuring it is 100% flat the time has come to install the track work. What will be outlined here is the basic technique applied to that task. 

The golden rule is bad track work CANNOT be fixed...!

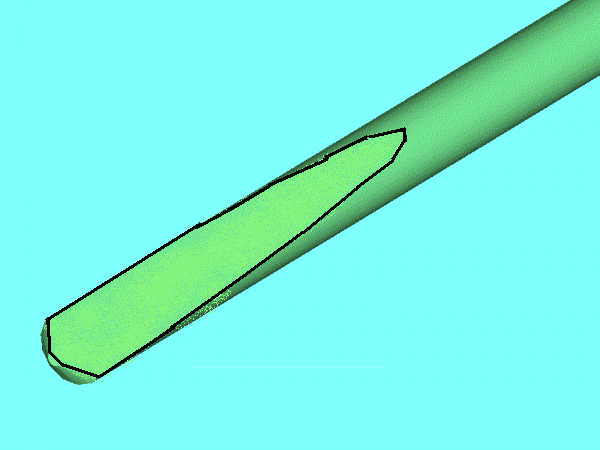
Curved Rail ready for Installation
The base as shown was fixed using acrylic sealant to the layout road base following the drawn center line and once the primer is dried the rail is inserted onto the tie plates in 840 mm length [ 40 feet x 3]. Each piece of rail is prepared for metal rail joiners at both ends and the plastic 6 bolt rail joiners are applied at  40 scale feet as described in the  the Turnout article.


Drilling Tie Plates for Spikes
The choice of the Peco Track Pins is described in the article on Turnouts which worked with no real issues so when problems occurred when spiking the rail it was a shock and required a rethink. The problem lied with the laser cut ply bases that the sleepers are attached to combined with the weakness of the pins. The pins fold up trying to be pushed through the ply base. 

Initially 0.020' [0.5 mm] drill was used but the pins just slipped into holes with little apparent holding power. The real issue was the short life and cost so another way had to be found. The answer was found in spring wire 0.020'' [0.5 mm] which was filed into a simple D bit by grinding 5 degree taper then form a point at the end. Using a small battery drill and chuck the wire drill cleanly through the sugar pine sleeper and ply base. In most cases the pins press in with a slight pressure were the pins fold up re-drill till success is achieved. These drills will bend to unbelievable angles without breaking and a length of piano wire will supply as many as any project would need. Another advantage is that the hole created appears to close up after the pin is inserted and develops excellent holding power.


D-BIT


Another problem was found with the foam base - it dose not resist pressure well but it was found that a scale ruler spreads the load enough to overcome this problem. To make this task easier adhesive was not applied at at the edges of the sleeper base.

Electrical Connection

Each rail is connected to the bus with 0.5 mm multi-core wire soldered to a brass tabs which in turn is soldered to the base of the rail . Even though the rail joiners are brass castings you do not depend on them to transmit DCC signal that the job of the wire.

Spiking Rail

When spiking it is critical that when the spike is inserted that it follow the path of the drilled hole. The shape point is necessary to successfully insert the pin but it will generate its own path and will fold the pin. 


In practice it has been found that the head of the pin should be bent from the normal axis to obtain a tighter fit. This is best done by drilling the hole at 5 degrees to the vertical. The pin is inserted until the spike pliers strikes the rail flange - using the pliers bend the head into the vertical and complete the insertion of the spike to the flange base


The Final Result

At this point the track is ready for weathering and ballasting which will be covered in separate articles.

Is there a downside its the speed but a looking at the finished product you are reminded it is all worth while - I think...!


Saturday, 19 January 2013

Track Sleepers

The series of videos on  The Route of The Arrow  on track work and specificity on painting sleepers [ties] and is a must view for those thinking of hand laying track. Visit OST Weathering Track Work web site as it will provide inspiration, incite and discussion on track work.

What will be covered here is the specifics techniques used to create the sleepers seen here.


After the adhesive has set all ties are sanded flat using 120 grit garnet paper glued to a flat piece of timber or Uni-Pro Sanding Block

Detailing is achieved in a time honoured manner by using a 42 tpi razor saw, X-Acto No 17 blade and dental pick. 

These detailing methods are covered in great detail in the OST - Detailing Track Work


After preparing all the timber sleepers the base colour of Mini-Wax Classic Grey is applied to all exposed timber faces. After the stain is fully dried weathering can commence. Mini-Wax Ebony is applied to all the heavily distressed areas. A small 1/8'' [3 mm] flat brush is used to apply the stain to these areas. The best technique is to just touch the area and allow the stain to spread. Continue to apply the stain outwards till the brush dry's out - reload brush and repeat. The goal is to taper the colour intensity. Some of the ties area's of plain ties can be blended with the Ebony Stain by loading a small amount of stain to the tip of the brush and then insert the bristles fully into methylated spirits [metho]  or isopropyl alcohol.


A alternative to using a liter tin of the Ebony Stain is to use Mini-Wax Wood Finish & Stain Repair pens are also available from Globak - click to go to web site

Once the stain is dried it is time to age the timber by applying Black Japan from Feast and Watson.

STOP here because this is were it can and will go wrong...!

Japan Black is an intense black and the fumes are issue and another suitable products could be substituted but it was used as it is a stain and is broken down by metho. Application MUST be done using a 1/8'' [3 mm] pointed brush. Dip the tip of the brush JUST into the Japan Black and  then into the metho bay about half its length. Just touch the tip into the deepest parts of the the distressing and allow it to spread - follow as the moment dictates and at the right moment insert the brush for full depth of the bristles back into the meto and flare the stain out. Try not to create stark blotch's or patterns but its just gut feel that will guide you.

When to you know when to stop?  The only advice that can be offered is when you begin to think "just a bit more" - STOP..!

In the example it may have gone to far and if it dose - stop - wait - come back and dry brush to break the effect down. The final appearance will appear a little stark but when the rails are installed onto the ties plates and it is in turn weathered it will break the effect down.


The final job is to remove all the fur from the sleepers. I use 180 grit Uni-Pro Flexible Sanding Pads.  They are flexible and conforms to the sleepers and remove most of the fur in one swipe. The other effect is to fade down the sleepers a tad and at this point a thinned mix of Classic Grey can be added using a large brush in a semi dry brush techniques. Tamyia Sky Grey can be dry brushed to further age the sleepers or break down some of the Japan Black.


Tuesday, 18 December 2012

Sleepers

The model is of a secondary main so the installation of tie plates and the prospect of having to install a thousand was something that keeps one awake at night. The key to salvation was the flexible track bases produced by the Aust 7 Modellers and pioneered by Trevor Hodges. These consist of a laser cut ply base that the timber sleeper sleepers are affixed to allowing O scale flex track to be produced by spiking down the rail.

Sleeper Base Jigs.

After much thought it was decided to develop a jig system to allow the production of sleeper base ready for track using the tie plate as the assembly key.

The jig consists of 3 separate pieces. The lower jig holds the laser cut tie base in its correct shape while the second jig or comb allows the Kappler ties to be fitted accurately so that the third jig can position the Right-O-Way tie plates onto the top side of the sleepers. The jig assembles the sleeper base with tie plates in 450 mm lengths of flexible track base ready for installation of rail using the tie plate to gauge the rail.

Sleeper Base Assembly.

Install two of the laser cut tie strips into the two halves of the lower jig assembly and then position the two halves of the second jig [comb] onto the first jig using the 1/8'' [3.2 mm] locator's pins. Fix the ties to the exposed side of the laser cut sleeper base, remove and allow adhesive to dry. The ties you use are 4'' x 9'' x 8'-6'' plain ties available from Right-O-Way or Gywder Valley Models

The adhesive used is the acrylic sealant applied with a scrap piece of styrene. Once complete remove from the base jig using a dental pick. Use extreme care as the glue will not have dried at this point - place aside and allow to dry.


One dry reinsert the assembly into the first jig and using a flat block with 180 Garnet paper sand smooth. Guide this operation by scribing a line's with a HB pencil line down the both sides and  sand until all ties have been touched by the sanding block and 90% is fully removed. 


Detailing is achieved in a time honoured manner by using a 52 or 42 tpi Zona razor saw, X-Acto No 17 blade and dental pick. These detailing methods are covered in great detail in the OST Publications on track mentioned in a previous blog.

Once this operation is complete stain the ties using the "Classic Grey" MinWax stain. This procedure is outlined in full detail on the The Route of The Arrow  article so it will not be covered here.

For more details on sleeper preparation and weathering see the article on sleeper weathering.


Re-install the tie assembly into the base jig and then reinstall the middle jig [comb] ensuring the comb is hard against the tie ends and finally install the top tie plate jig. Clip off 3 pre-painted sprues of Right-O-Way tie plates and begin installation. The tie plates are picked up with a sharp needle - apply a drop off ACC to the base on its centre and install through the opening in the tie plate jig ensuring that the short end [the side with the holes not slots] faces to the outside. Remove the completed assembly from all the jigs and it provides 450 mm [18''] of flexible track base with tie plates ready to install on the layout and ready to accept rail,

Failure to do this will effect gauge of installed track.....!